Toolbar Manual
Flyout Menu › Toolbar Settings › Labels
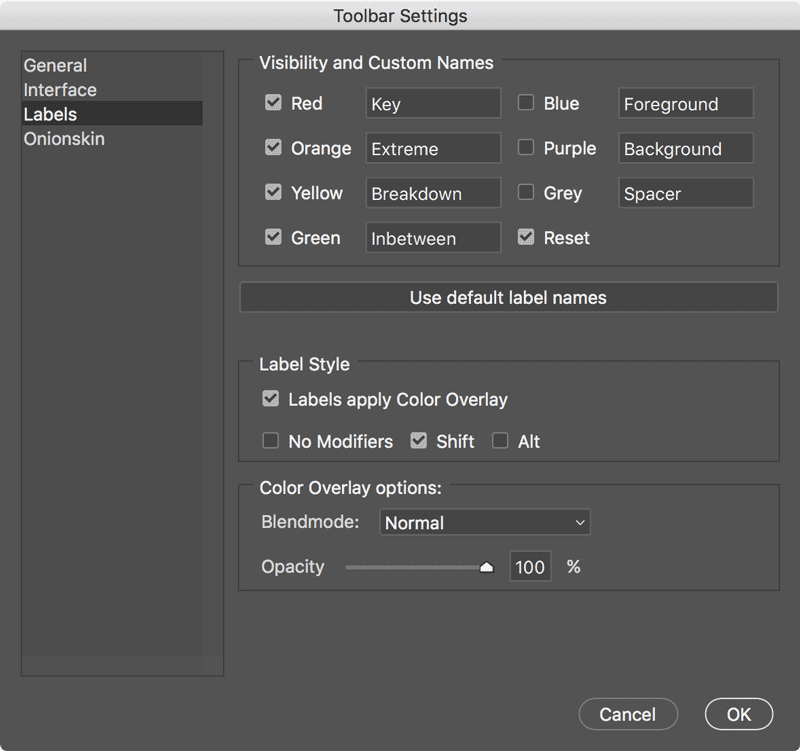
Visibility and Custom Names
The check boxes control the visibility of the corresponding coloured button in the toolbar’s ui. By default only the first four label buttons (+ reset) are checked to save on ui space.
The textfields contain the (default) names used to rename or create/cut a layer section with the label buttons. You can change the default names to whatever you like. Label colours are visible in the timeline window and the layer stack. The colours are only used to organise your layers and don’t change the layers appearance on the canvas unless a Layer Style is applied.
If you like to revert to the default layer names just click on the “Use default layer names” button.
Label Style
Tick the checkbox of the “Labels apply Color Overlay” option if you want a layer’s artwork on the canvas to be colourised with the label’s colour when a label is applied. When selected the “Toggle Color Overlay” button is added to the labels toolgroup.
Choose when the Color Overlay effect is applied by ticking one of the checkboxes next to “No Modifiers”, “Shift” or Alt.
Select “No Modifiers” if you want to apply the Color Overlay effect, every time you apply a colour label from the Animator’s Toolbar.
Select “Shift” if you want to apply the Color Overlay effect only when you choose to label and rename a selected layer.
Select “Alt” if you want to apply the Color Overlay effect only when a new layer section/frame is created with the colour label buttons from the Animator’s Toolbar.
Color Overlay options
Depending on your artwork you might want to tweak the Color Overlay effect setting for clarity. Filled shapes can turn into solid silhouettes when the default settings are used. Changing the blendmode or opacity can help to keep your artwork readable.